
Routine Core Analysis
Routine Core Analysis provides geologists and engineers with their first "hard data" related to the downhole environment. IGL recognizes this value and strives to deliver the highest quality routine measurements.
 Core Plugging & Slabbing
Core sample physical properties are usually determined from 1.5" diameter plug samples cut from bulk subsurface core. For whole-core analysis, the cylindrical core material is cut length-wise (into two "slabs") using a specially designed saw. The slabbed cores can be displayed for description, viewing, or documentation.
Sidewall Core Analysis
IGL capabilities include rapid handling and processing of both rotary and percussion sidewall cores. Services provided include bulk volume, porosity, fluid content, laser grain size analysis (LPSA), air permeability (empirical estimate), and photography (color and UV). The IGL staff is well experienced in deriving the most representative characterizations from these types of cores.
Basic Properties
Basic properties are measured on cleaned, dry samples drilled from the whole core by diamond-bit core drills. Our lab is equipped with the latest CORETEST Systems AP-608 Basic properties are measured on cleaned, dry samples drilled from the whole core by diamond-bit core drills. Our lab is equipped with the latest CORETEST Systems AP-608 automated permeameter/porosimeter. Standard basic property measurements are helium porosity and permeability(Klinkenberg corrected).automated permeameter/porosimeter. Standard basic property measurements are helium porosity and permeability(Klinkenberg corrected).
Fluoroscopy
High-resolution fluoroscopy provides the ability to perform quantitative image analysis, including a high resolution density log of the entire core. Each scan contains X-Ray density standards. The log provides an important record of variations in lithology and porosity throughout the length of the core. This means that the owner of the core can have approximate porosity and lithology estimates before the core is even slabbed.
- Reveals bedding plane & fracture orientation
- Global digital output
- Real-Time rotational observations
- Provides core orientation prior to slabbing and plugging
- Rapid in lab results
X-Ray Computed Tomography (CT) Analysis
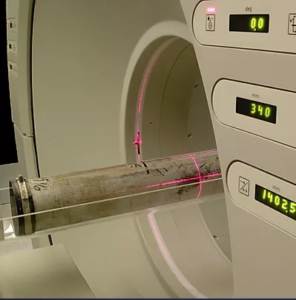
X-ray computed tomography is now the industry-wide technology for whole-core inspection, core-log correlation, and plug sample characterization.Capabilities include 0.35-mm resolution, radiographic (pilot/scout) scanning, up to 140 kVp at 200 mA, and scan times up to four seconds. With these capabilities and our SUN-based workstation, we can provide clients with state-of-the-art CT core inspection and characterization. Standard output includes CT radiograph plus axial CT scans. Plug scans may also include both longitudinal and axial CT scans.
Specifications
- X-ray: 80 to 140 kVp, 30 to 200 mA
- Scan Times: 1 to 4 seconds
- Resolution: 14 line pair/cm (0.30 mm)
- Detectors: 1200 fixed
- Gantry Opening: 48 cm
- Table Movement: 1 meter (2 meter “back-to-back” scanning
Scanning Modes
- Spiral for transient or 3D volume data
- Rapid multiple or single slices
- Radiograph scans (linear x-ray)
